How to Apply Elastomeric Roof Coating in 3 Easy Steps
Even for the most experienced DIY-ers, kicking off your own elastomeric roof coating project can be intimidating. After all, making sure your elastomeric roof coating is properly applied is important for ensuring your roof is protected from leaks, weather damage, and providing it with a reflective coating that helps reflect light and keep the building cool. It is a job that is important to make sure it is done right.
However, despite the importance of the project, applying elastomeric roof coating isn’t as intimidating or ultra-difficult as it may seem! All you need is to understand the important facts about elastomeric roof coating and, you might be surprised to hear, applying elastomeric roof coating can be done in three easy steps!
If you are considering taking on a DIY elastomeric roof coating project, here are a few important things to keep in mind as you prepare as well as the simple steps required to apply it that are as easy as 1, 2, 3.
What to consider:
What is Elastomeric coating?
If you are going to be putting something on your roof, it is probably a good idea to know exactly what you are working with, right? Elastomeric coatings are liquids used in a variety of different exterior applications such as concrete, stucco, and masonry walls to add a layer of protection against wear and tear, as well as helping the surface preserve its attractive appearance.
These liquids have a greater volume and thickness than standard paint coatings but are applied in the exact same way. No need for special equipment or processes. This greater volume gives elastomeric coatings far superior water-resistant properties as well as greater durability and flexibility than paint.
What materials are used?
Elastomeric coatings come in the form of several different materials, each with different properties that give them varying strengths and weaknesses. Elastomeric coatings include: butyl, acrylic, polyurethane, and silicone.
Because they are slightly different, elastomeric coatings are not a one-size-fits-all choice, and you will need to carefully consider each material’s properties before making a selection for your project. You can learn more about each one of these four materials here.
How long does it last?
Once applied, elastomeric roof coatings can last anywhere from 10 to 20 years, depending on the thickness of the coating and how well you maintain your roof after application. Regular inspections by roof coating experts as well as a combination of regular cleaning and care can keep your roof coating in good condition and maximize its protective qualities for as long as possible.
How much does it cost?
Depending on the elastomeric material you ultimately choose, elastomeric roof coating can cost anywhere between $14 to $65 per gallon. That is why it is important to keep your project’s budget in mind when considering your options for materials. A roofing expert, like Rugged Coatings, can be helpful to consult during this process to help you make the best material decision for your project.
Step 1: Thoroughly Clean the Surface
The first, and perhaps most important step, in the elastomeric roof coating application process is to ensure that the surface you plan to apply the coating to is thoroughly cleaned and clear of any dirt, debris, gravel, sticks, or any other obstructions before you do anything else.
If you apply your roof coating onto a dirty or unclear surface, any and all debris will be coated in the and your coating may not adhere to the surface properly due to the obstructions. This will ultimately inhibit the protective qualities the coating would normally offer and may leave vulnerable areas uncovered.
The best way to get your roof ready for elastomeric coating is to remove large debris by hand or with a pushbroom or blower. Then use a pressure washer to clear away leftover dirt and grime on the surface. If you do use a pressure washer, make sure you allow your roof to dry completely before continuing. This should take a few hours.
Step 2: Repair Any Cracks
Once the roof is clear and dry, it is time to address any existing roof damage that might also impact the effectiveness of the adhesion and sealant. Over time, weather and normal wear and tear can cause your roof to crack or blister. While this is normal, these damages and imperfections must be repaired before you are able to apply your elastomeric roof coating. Otherwise, a proper seal may be prevented from forming and your roof may be denied proper protection from water.
Acrylic roof sealant is a good material to use to repair cracks and damage in this situation. Using the instructions given by the product, use a trowel or roof brush to spread the sealant over the area and allow to set before proceeding with the application of your roof coating.
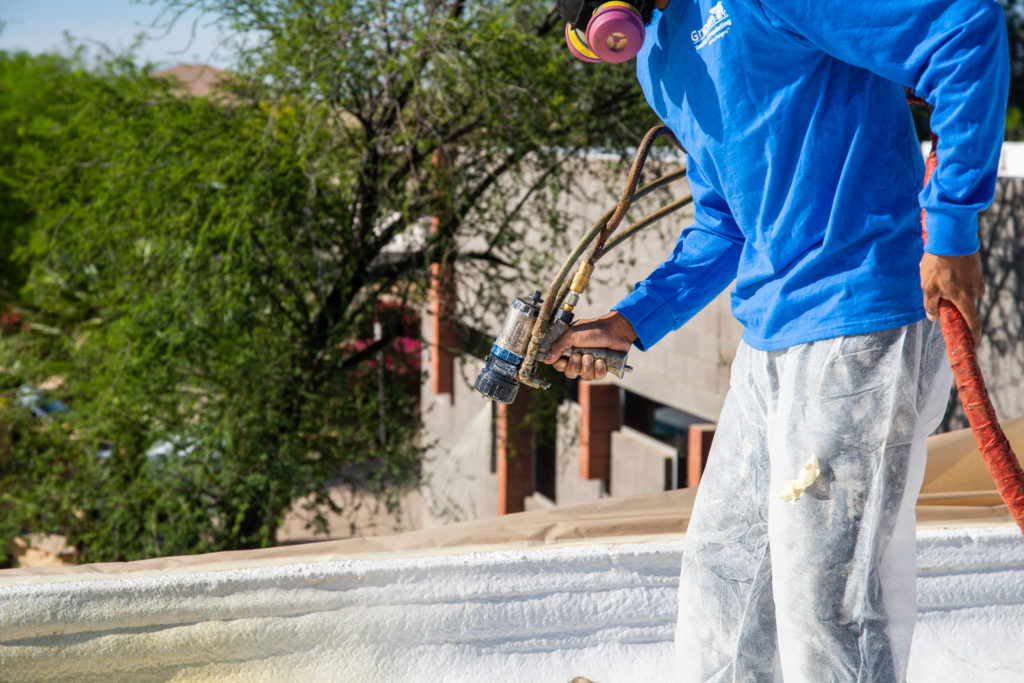
Step 3: Apply!
Now that your roof is clean and all potential problem areas have been dealt with there is only one thing left to do: apply your elastomeric roof coating! See: we told you it was simple. However, for the best results of your roof coating application you don’t necessarily want to do the project under just any old conditions. Make sure you check the weather and do some planning to make sure that the day you choose is a clear, warm, sunny day with temperatures in the mid to high-60’s for best results and avoiding issues with moisture.
To apply elastomeric roof coating, use a professional roll for larger jobs or a brush for smaller ones and apply a generous coat onto the surface. Remember, thickness plays an important role in determining its durability and lifespan. Always consult the manufacturer and instructions for exact application recommendations, but in general you should plan on giving your roof at least two coats to achieve a minimum of 20 dry mils thickness.
Apply from edge to center, working from one end of the roof to the other, and maintaining a wet edge at all times. If the weather cooperates, your first coat of elastomeric roof coating should be dried in 24 hours, at which point you can repeat the process to apply your second coat. After that, the only thing left to do is take a step back to admire your beautiful new roof’s protective sheen.
Rugged Roof Coating
Elastomeric roof coating is an important project to complete correctly, but that shouldn’t mean it should be an intimidating process. All you need to do is make sure you are working on a clean and repaired roof before you start.
Of course, if you want to make extra sure your project is done the right way, you can always call the professionals. Rugged Coatings is an American leader in elastomeric roof coating products and are available and ready to answer any questions you may have about your roof coating project and help you complete your project the right way.
When you pair Rugged Coatings elastomeric coatings with our sister company’s world-class spray foam, Accufoam, you get the industry’s best complete solution for high-spec roofing systems. When protected from UV and toughened by our elastomeric coatings, your Rugged Coatings roofing system will outperform every expectation.
If you need help getting started, call or contact the experts at Rugged Coatings today.